Fortress Rough Opening Accessory (ROA) Installation Kits
for the most common window installations.
(Other window installation details are available in the Fortress Installation Manual)
STEP 1
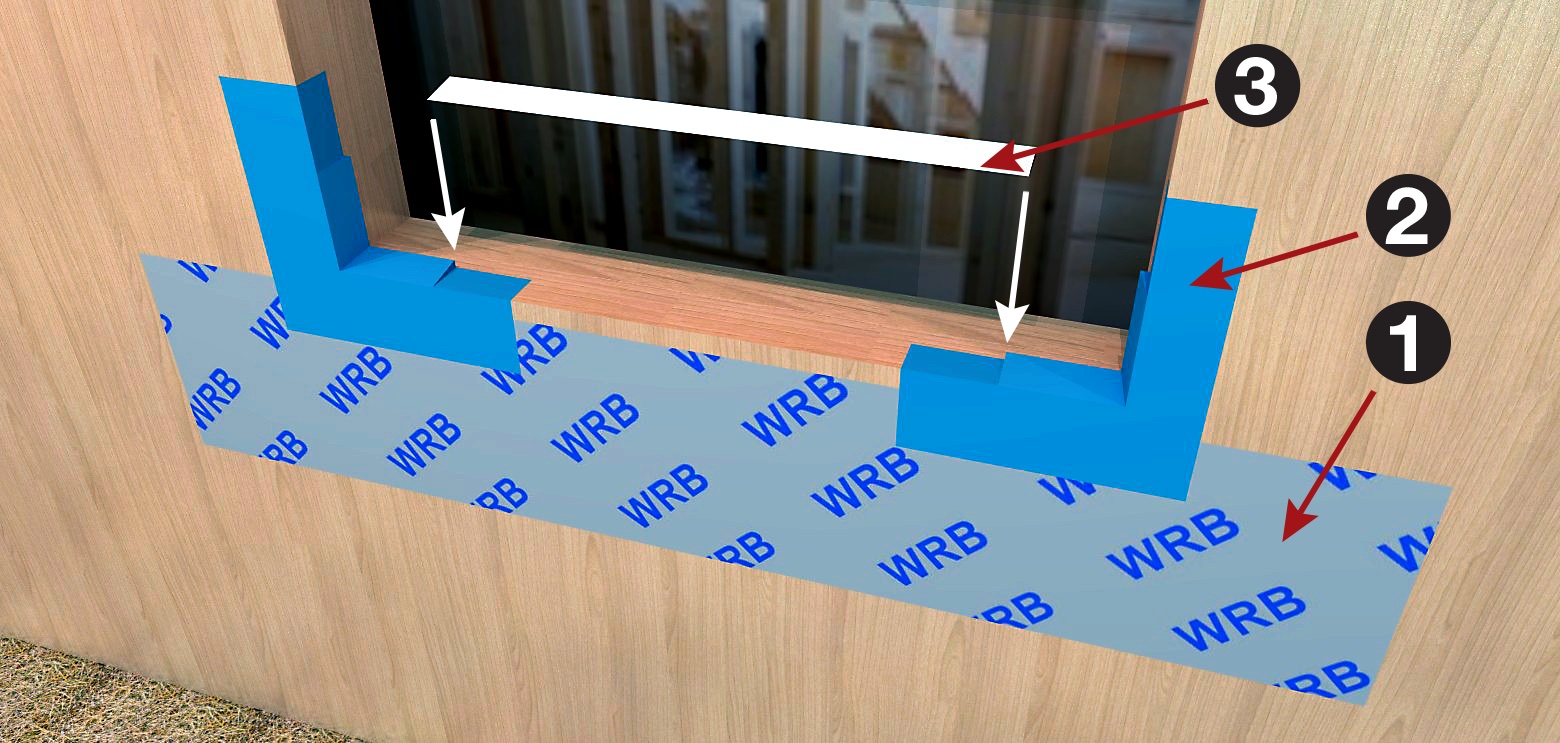
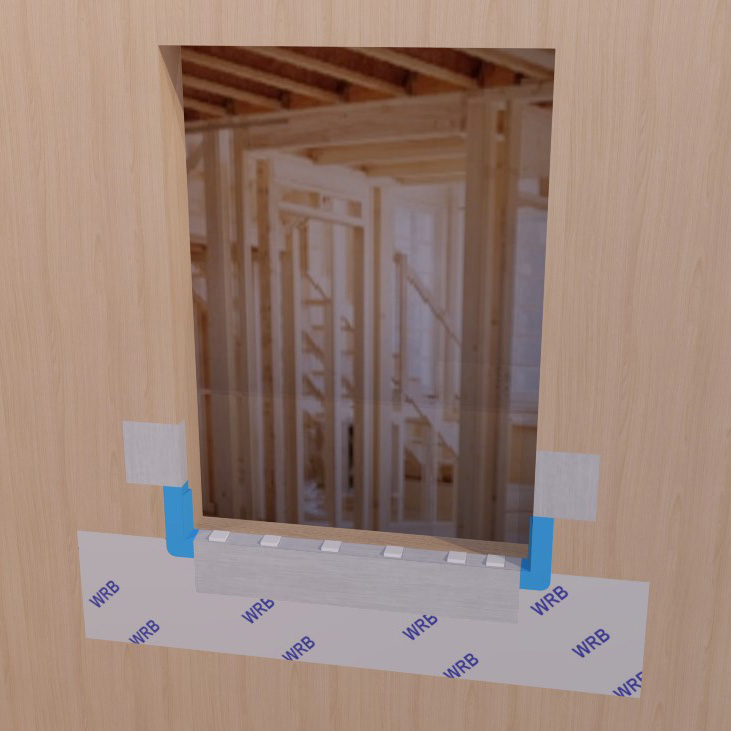
(1) Install Weather Resistive Barrier (WRB) 1/2″ down from window sill.
(2) Install Fortress Sill Corners.
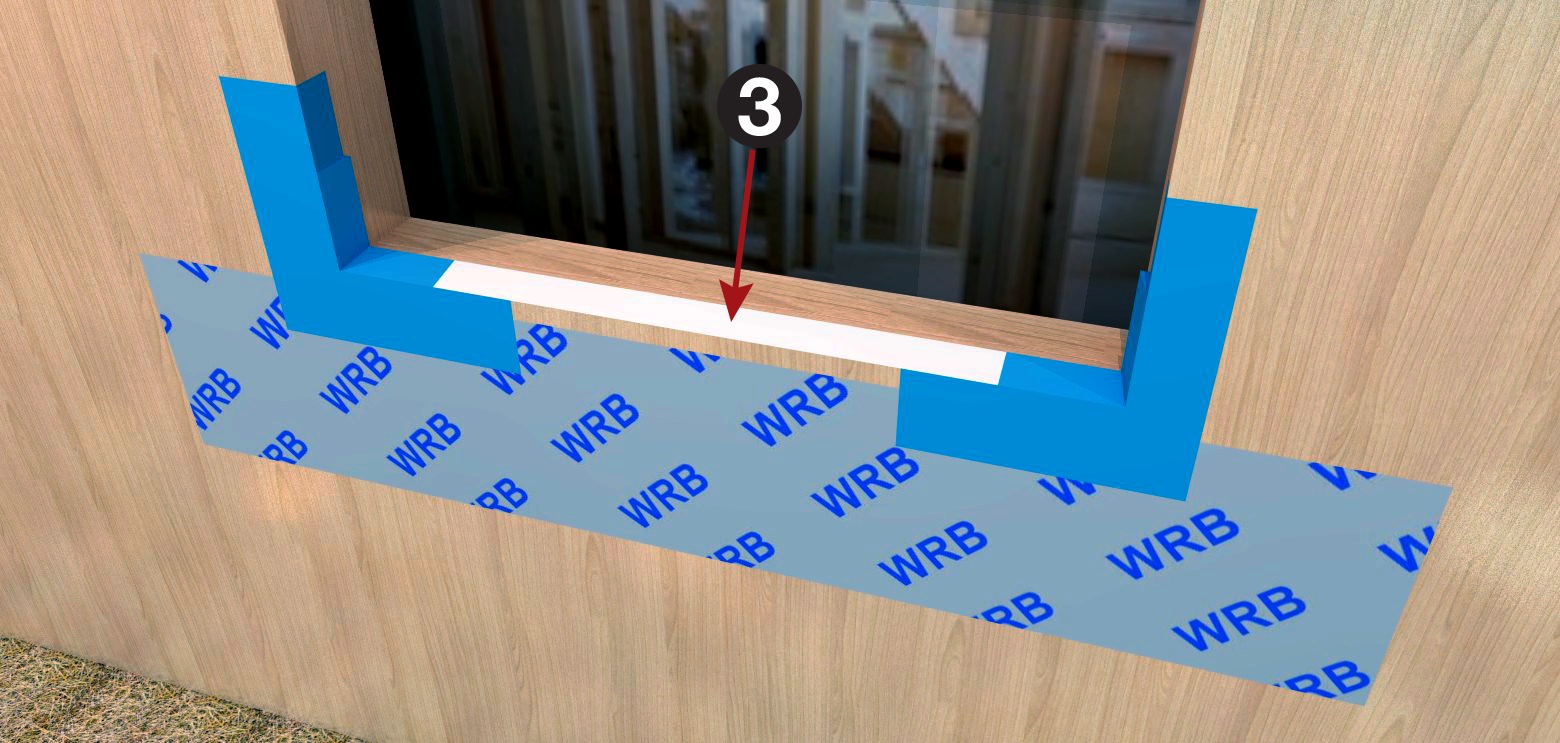
(3) Cut Fortress Centre Strip to fit in between Fortress Sill Corners. Cut to length as required.
STEP 3
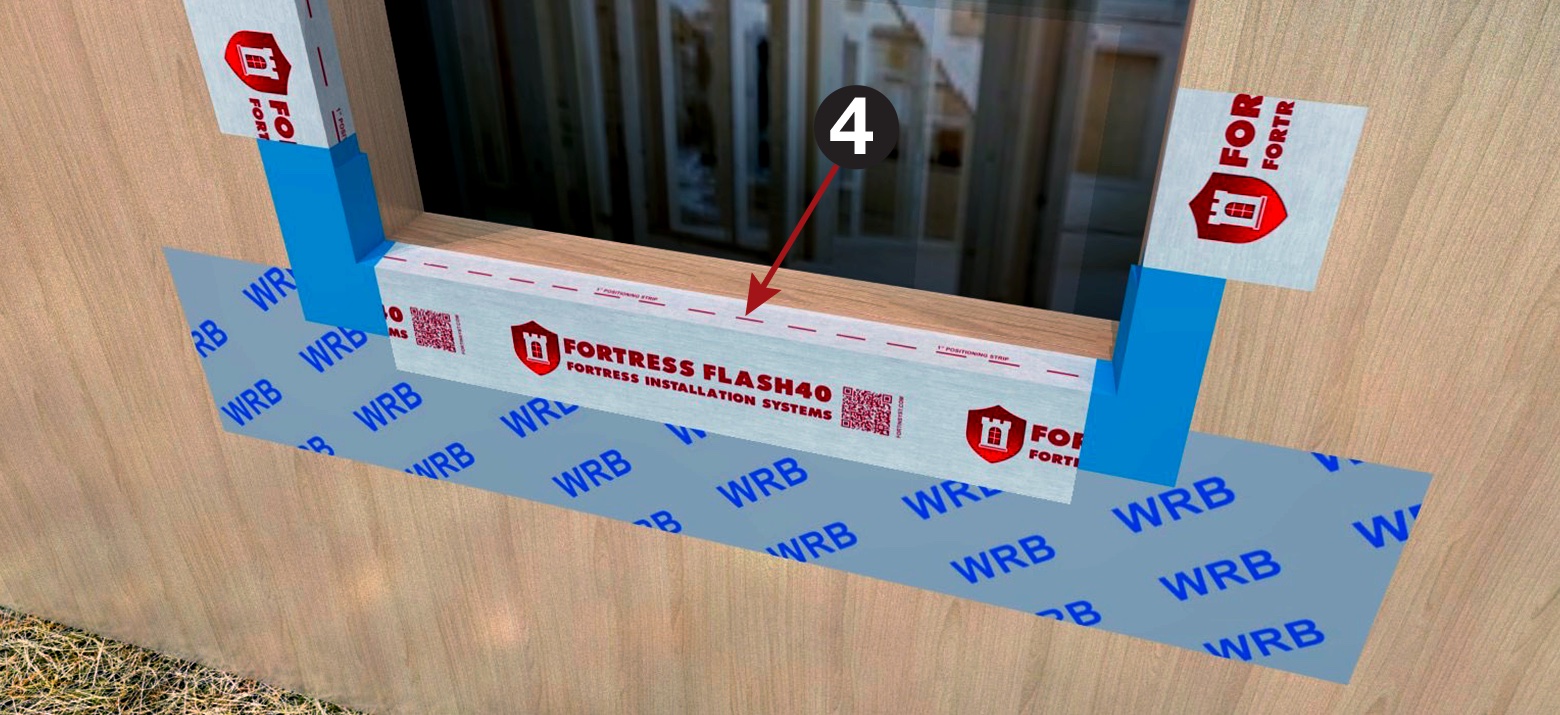
(4) Install industry leading waterproofing membrane flashing tape at sill. Set membrane into position on sill and apply pressure to bond into position.
Install 7″ long strop of flashing tape at jambs over lapping 3″ onto Fortress Sill Corners.
Roll all membrane flashing with 1″ wide roller with adequate pressure for full bonding as per manufacturer’s recommendations.
STEP 4
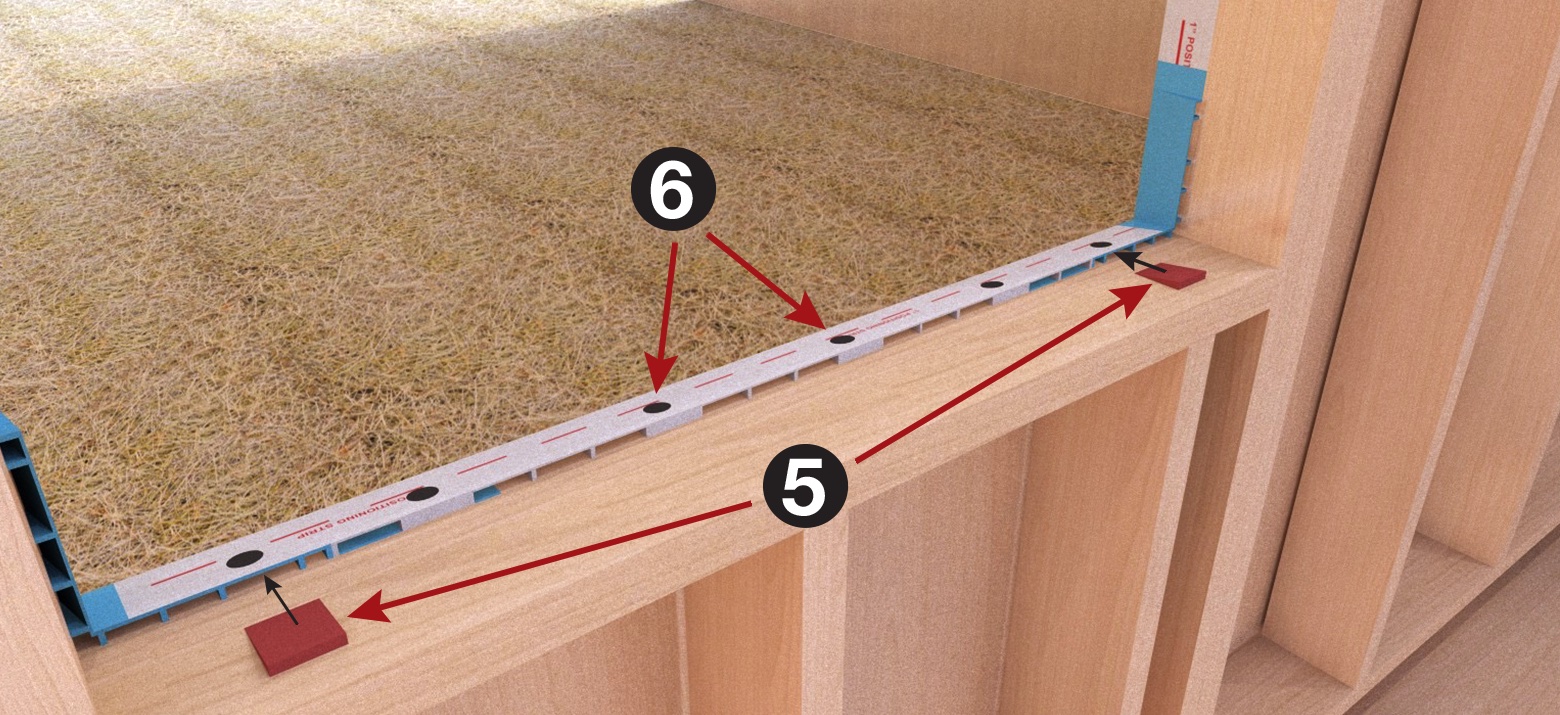
(5) Insert Fortress Lower Sloped Shims into back side of Fortress Sill Corners.
(6) Apply 3/8″ diameter dab of mastic at locations of Fortress Upper Sloped Shims as required to hold the upper shims into position.
STEP 5
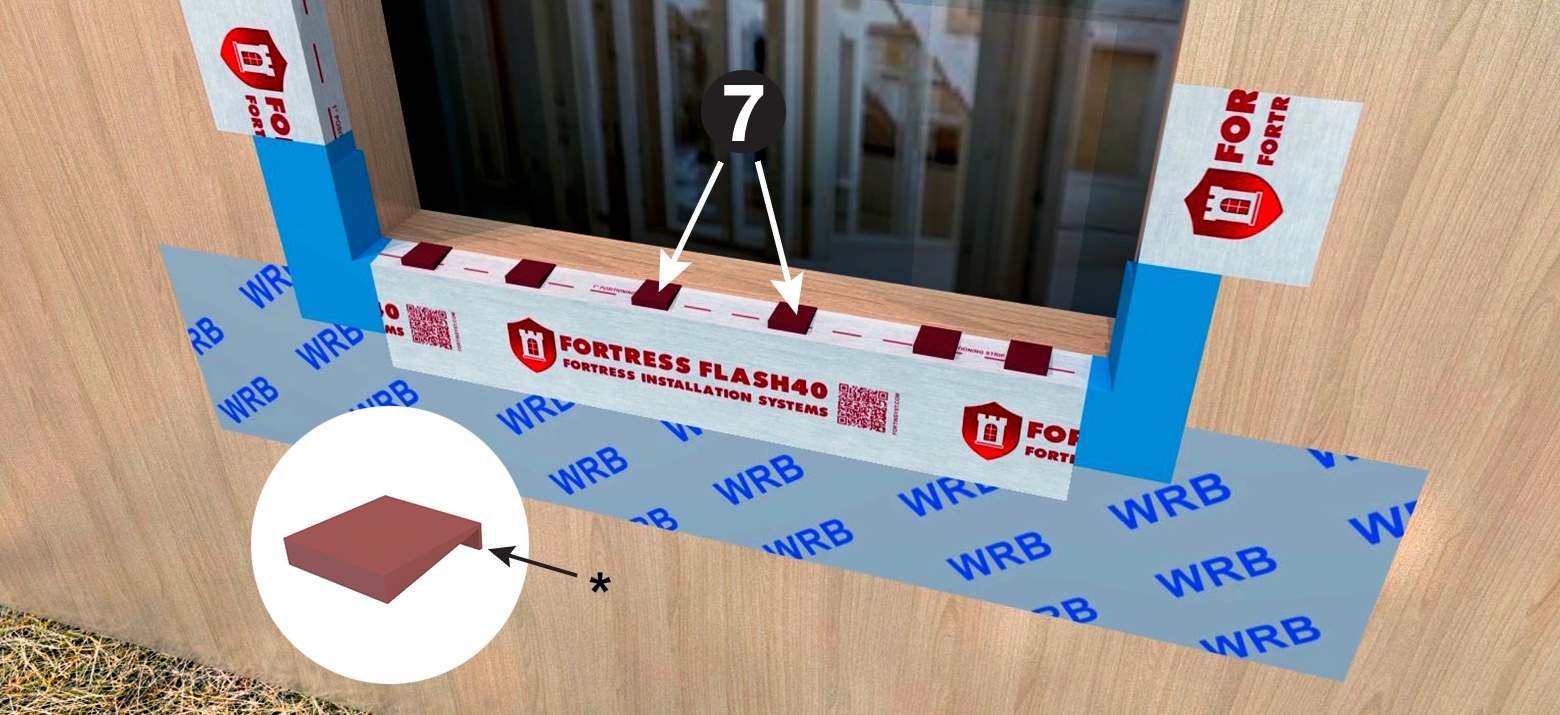
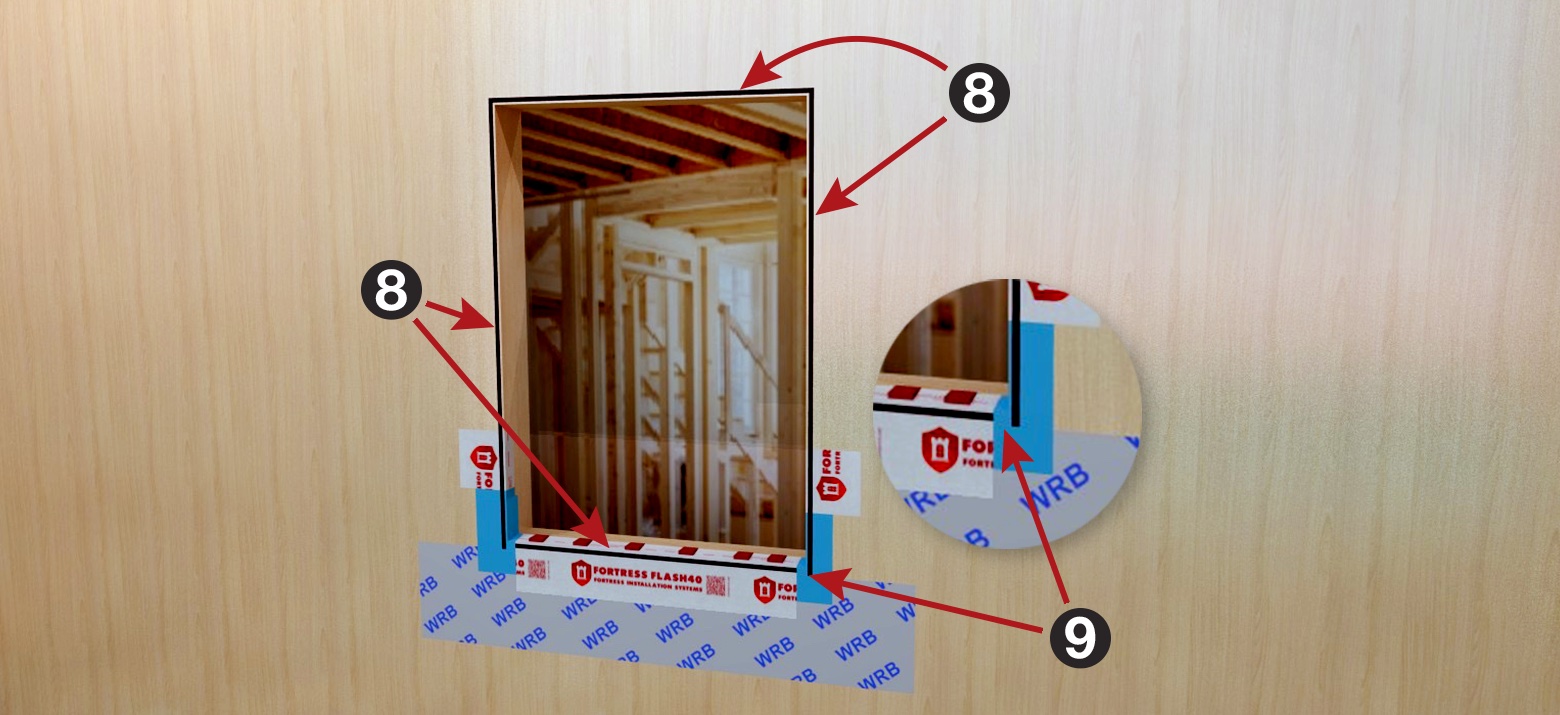
(7) Install Fortress Upper Sloped Shims at 12″ o.c. or as required by the window manufacturer.
The back hook assists to align the Upper Sloped Shim and holds it in place.
STEP 8
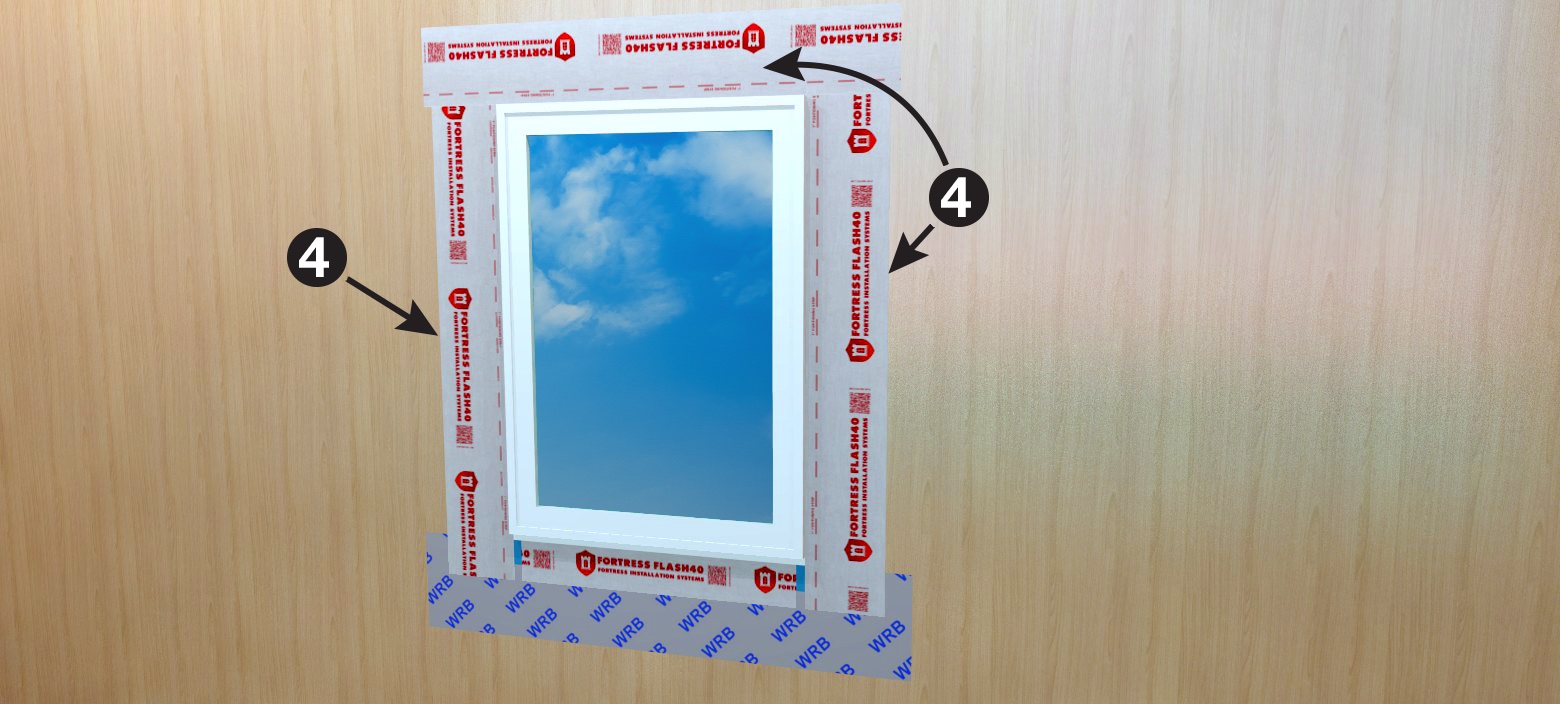
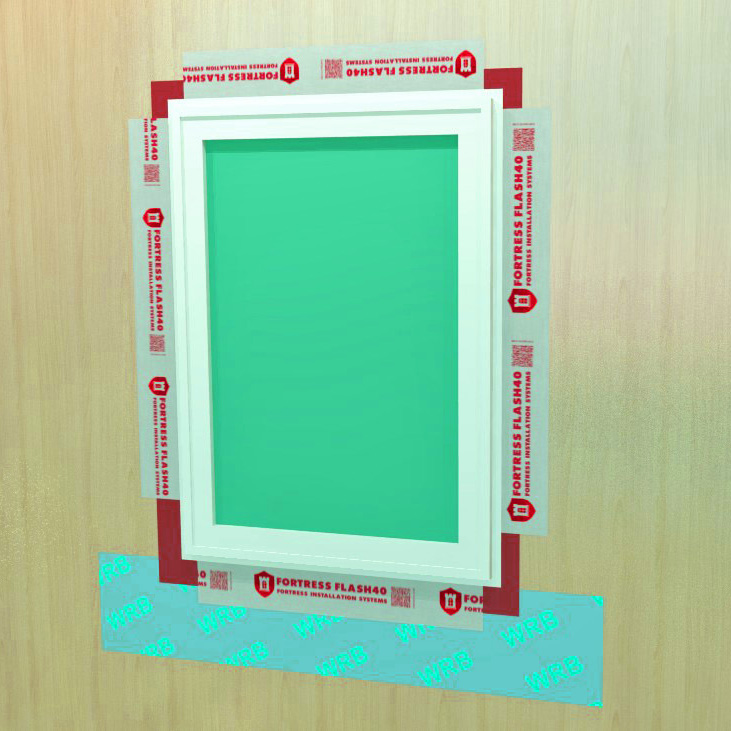
(4) Install industry leading waterproof membrane flashing tape at heads and jambs. Set membrane flashing into position and apply pressure to bin d into positions.
Roll all membrane flashing with 1″ wide roller with adequate pressure for full bonding as per manufacturer’s recommendations.
FORTRESS Rough Opening Accessory (ROA) Kits Installation Videos
Click on video images to watch the video.
Job Site Installation Video

